// Docs
The interface
MillPath has one screen: setup and operations on the left, the drawing in the middle with the simulation under it, and the selection or the selected operation on the right.
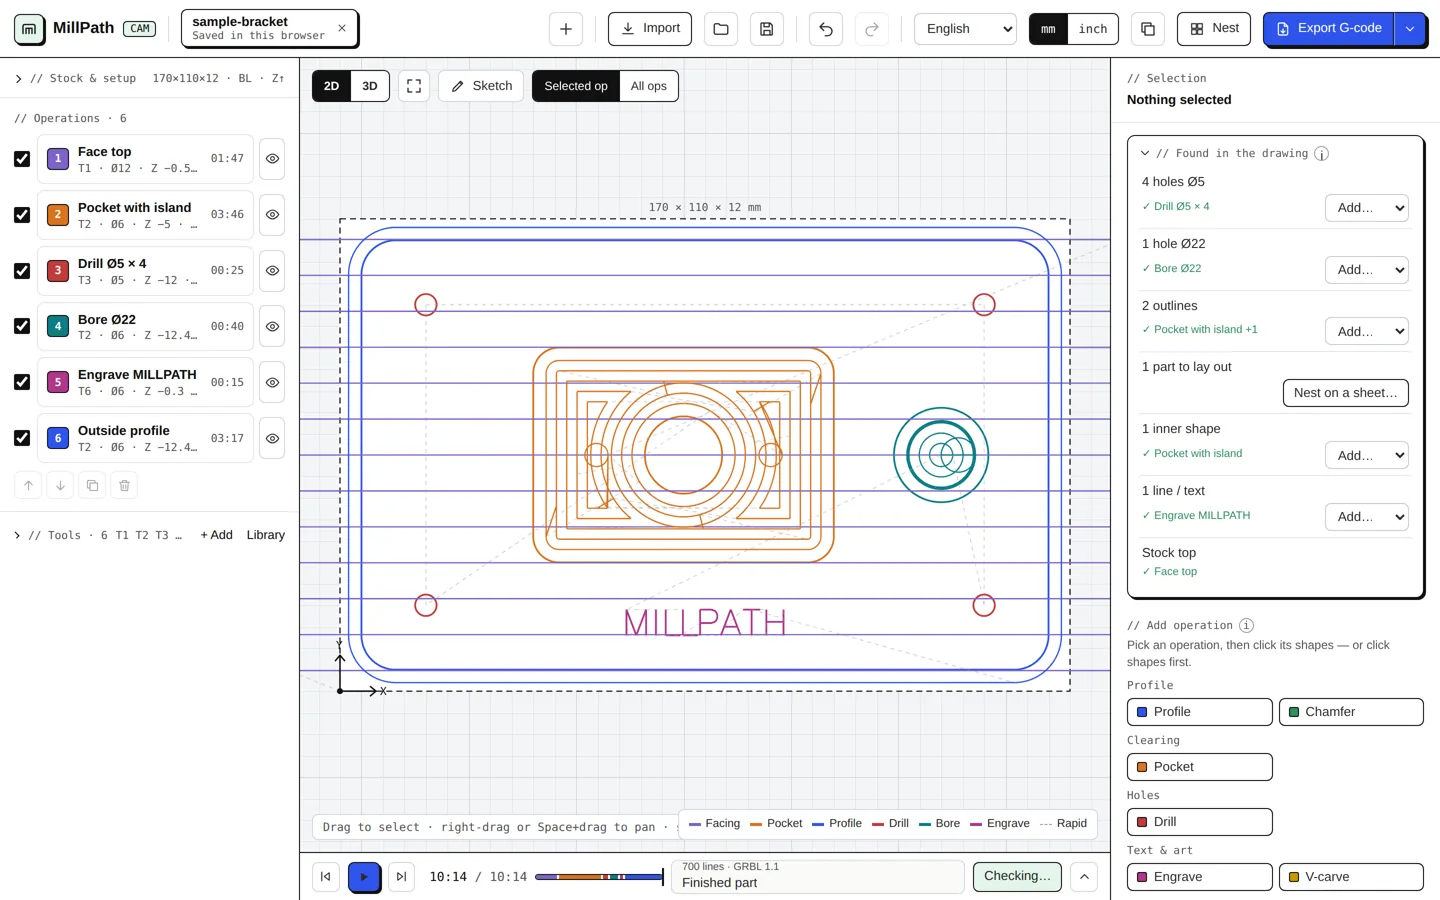
Top bar

| Button | Name | What it does |
|---|---|---|
| + | New project | Opens a new, empty project in a new tab. |
| Import | Import a drawing | DXF or SVG. You can also drop a file on the drawing. |
| Folder | Open project | Opens a MillPath project file (.mpj). |
| Disk | Save project | Saves the project as a .mpj file. Projects are also kept in this browser automatically. |
| Arrows | Undo / Redo | Ctrl+Z / Ctrl+Shift+Z. |
| English | Language | English or Spanish (Español). |
| mm / inch | Units | Shows and enters lengths in millimetres or inches; fractions such as 3/4 work in inch fields. |
| Copy | Copy G-code | Copies the G-code to the clipboard (for controllers that take pasted code). |
| Nest | Nest | Lays out copies of the part on a sheet, then you export the sheet. |
| Export G-code | Export | Writes the G-code file for the chosen post. The arrow next to it opens Export options. |
Left: setup and operations
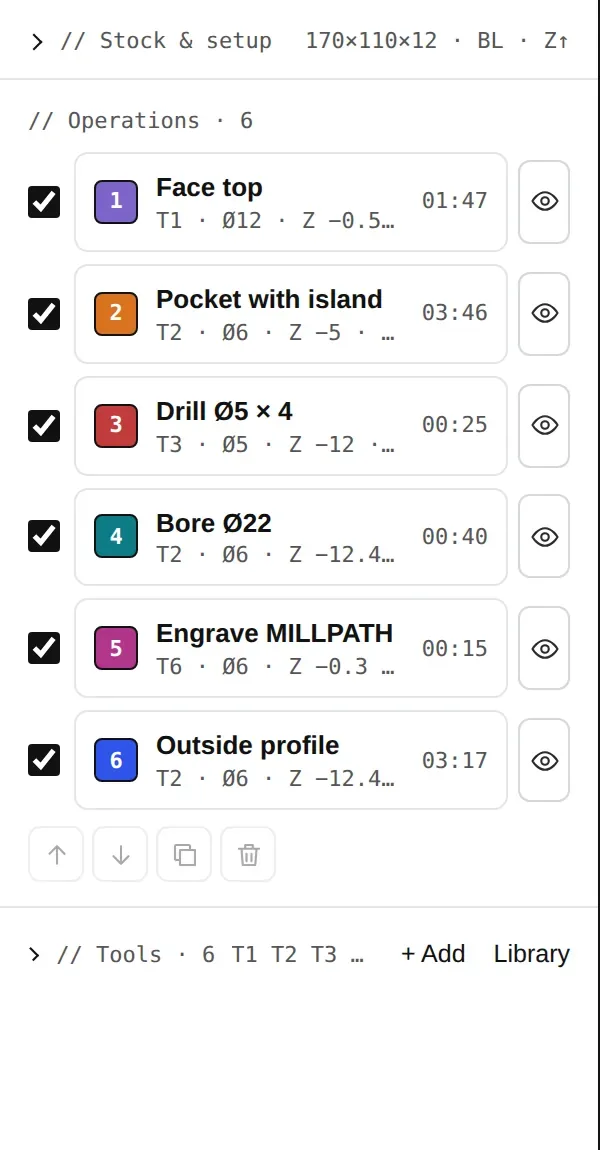
// Stock & setup — thickness, margin, the work zero in X Y (a corner, the centre or the drawing origin) and Z zero on the stock top or the table. Heights & machine holds the safe heights and machine limits.
// Operations — in cutting order. Each row shows the tool, its diameter and depth, and its run time. The check box includes or leaves out an operation; the eye hides or shows its toolpath on the drawing. Under the list: move up, move down, duplicate, delete.
// Tools — the tools of this project. + Add creates one; Library keeps your tools and presets for every project.
Right: the selection and the operation
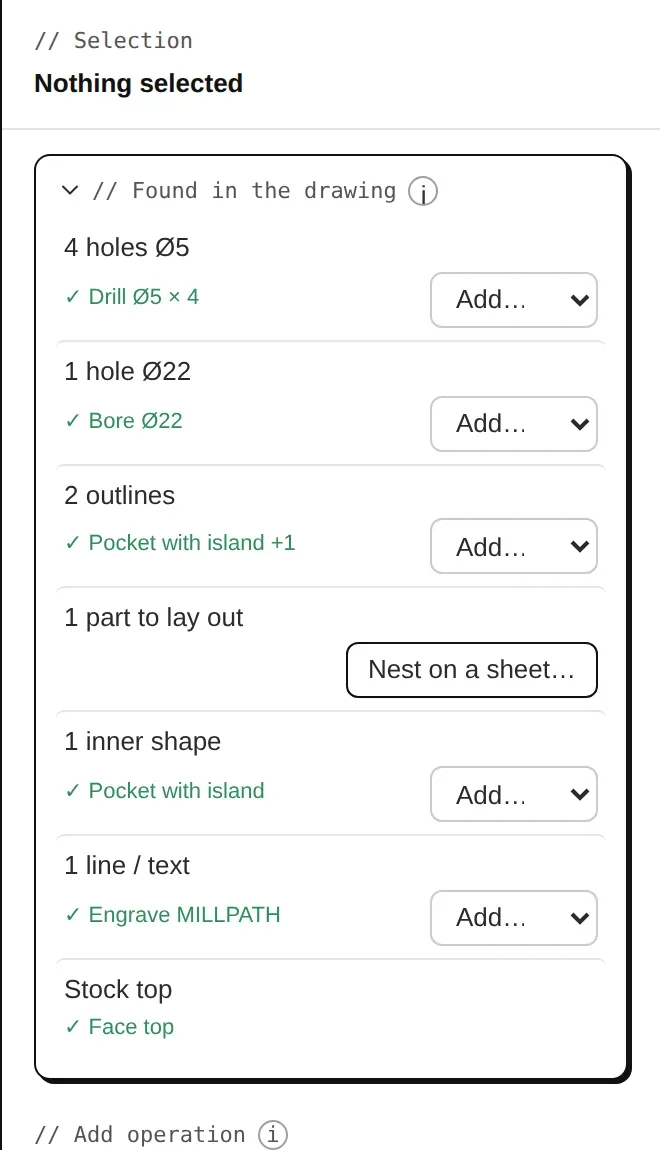
With nothing selected, // Found in the drawing lists what MillPath recognises — holes by size, outlines, inner shapes, text — with a suggested operation for each (Add…) and a tick where an operation already covers it. Apply all adds every suggestion.
Below, // Add operation lists the operations by group; their keyboard keys are shown on hover.
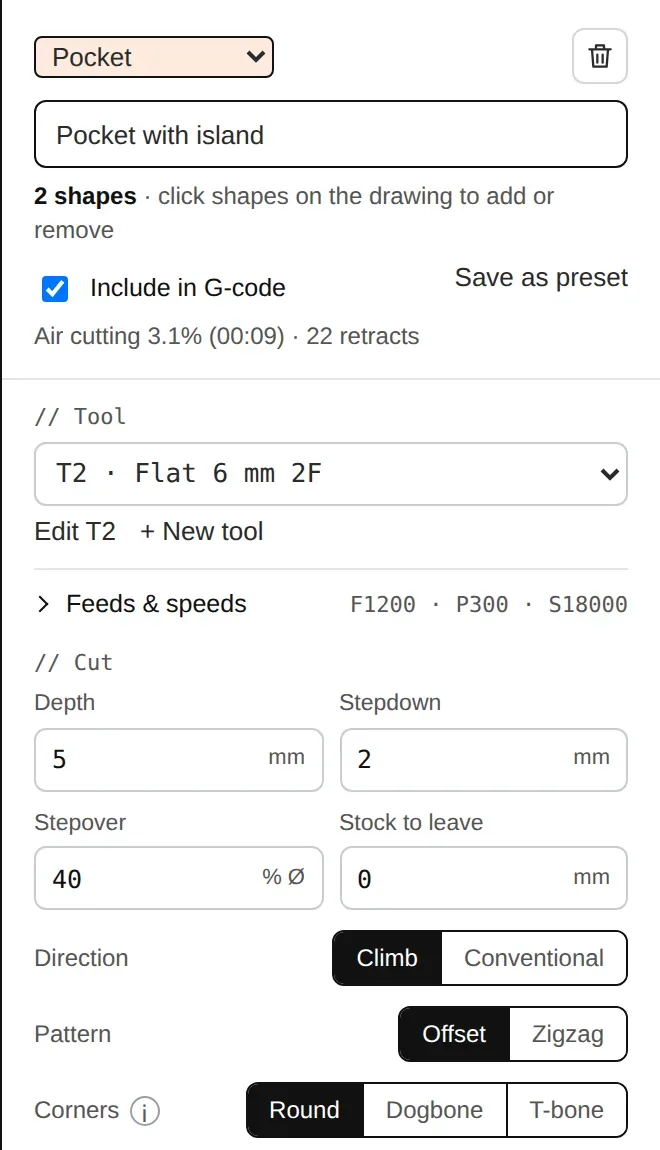
Select an operation to change it: its type, name, shapes (click shapes on the drawing to add or remove), tool, Feeds & speeds, the cut settings, heights and coolant.
The line under the name shows the air cutting share and the number of retracts — a quick way to compare settings.
A small (i) next to a setting explains it. Every setting is described in Operations.
Simulation and checks

Play, step move by move, or drag along the coloured bar (one colour per operation). The middle shows the G-code line and the operation at the current point. Checks OK — or the number of problems — opens the safety checks. The arrow on the right opens the full panel with the G-code and the speed.
Export options
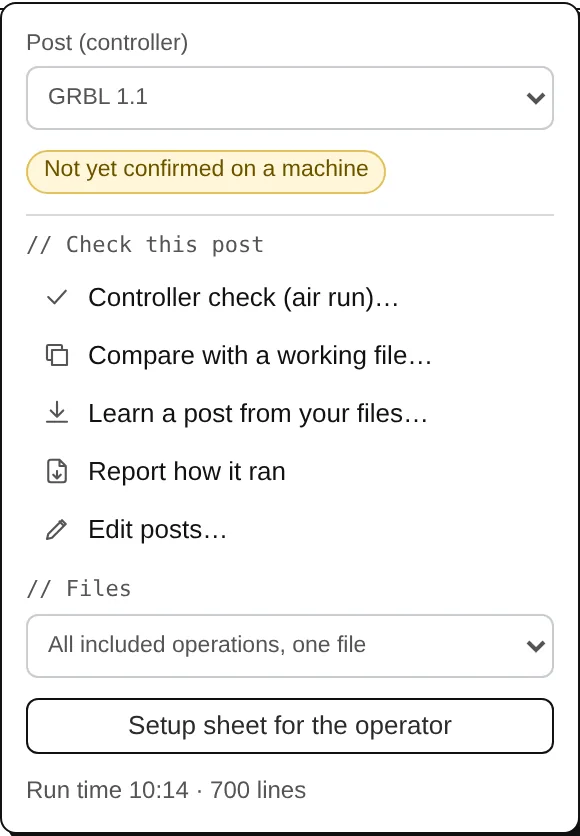
Post (controller) — your controller. The badge says whether the post is confirmed on a machine.
// Check this post — the controller check in the air, compare with a file that runs on your machine, learn a post from your files, tell us how it ran, edit posts.
// Files — one file, the selected operation only, or one file per tool for manual tool changes; the setup sheet for the operator.